Mounting a TV in an RV or camper starts with finding a reinforced wall area, choosing a compatible TV mount, and securing the bracket with the correct hardware. Once the TV is installed, you’ll also need to make sure it stays secure while traveling.
Unlike mounting a TV at home, RV installation requires extra care because walls are often thinner and may not have standard studs. Never drill until you’ve confirmed the wall can support your TV.
This guide walks you through the entire installation process, from locating the TV backer to mounting the screen and preparing it for travel.
Can You Mount a TV on Your RV Wall?
Yes, you can mount a TV on many RV walls, but not every wall is strong enough to support one. Unlike a typical house, an RV may have thin interior panels, lightweight framing, and insulation between the wall surfaces. Screwing a TV bracket directly into decorative paneling can cause the mount to loosen or pull away, especially when the vehicle is moving.
Many travel trailers and motorhomes have a factory-reinforced area intended for television installation. This may be a plywood board, a metal backing plate, or another reinforced mounting surface hidden behind the finished wall. Finding and verifying this support is the most important step before you begin drilling.
How to Find and Verify the TV Backer
A TV backer is a reinforced area behind an RV wall designed to support a television mount. Some manufacturers identify it with a sticker reading “TV Backer,” “Mount TV Here,” or “TV Mounting Location.” Common locations include the living room entertainment area, bedroom wall, and spaces near existing TV connections.
Start by checking your RV owner’s manual and looking for mounting labels. If you cannot find a label, contact the RV manufacturer with your model information to ask whether a reinforced mounting area is available. A nearby cable outlet or electrical socket may suggest where a TV was intended to go, but it does not prove that the wall behind it can support a mount.
A stud finder can help locate framing or hidden reinforcement, while a strong magnet may help identify a steel backing plate or metal fasteners. However, a magnet will not detect plywood or aluminum backing directly, and stud finders may give inconsistent readings on some laminated RV walls. Compare several clues rather than relying on a single tool.
Also, do not assume the center of a TV Backer sticker marks the exact drilling location. A mounting label may indicate only the general location of the reinforced area. Before installing the bracket, confirm that its mounting holes align with the actual backing or another approved structural support.
What If You Can’t Find a TV Backer or Studs?
Not finding a TV Backer sticker does not automatically mean you cannot install a TV. Some RVs have structural framing that may support an approved mounting arrangement, while others require additional reinforcement. The important distinction is whether the proposed mounting method transfers the television’s weight to suitable structural support rather than relying on thin wall paneling alone.
For example, some RV owners install a plywood board spanning multiple confirmed framing members, then attach the TV bracket to that board. This can help distribute the load, but only when the underlying structure, fasteners, and installation method have been verified. Simply screwing or gluing plywood to an unsupported interior panel does not make it a reliable mounting surface.
Use the following guide before deciding whether to proceed:
| RV Wall Condition | Recommended Action |
|---|---|
| Factory TV backer is confirmed | Follow the RV manufacturer’s mounting instructions and weight limits |
| TV Backer sticker is present, but the backing is unclear | Verify the reinforced area before drilling |
| Structural framing is identified | Confirm whether the mounting method is approved and sufficiently supported |
| No suitable backing or framing can be confirmed | Do not mount directly to the wall panel |
| Wiring, plumbing, or wall construction is uncertain | Stop and consult the RV manufacturer or a qualified installer |
If your camper has no suitable wall support, a removable TV setup or properly secured cabinet installation may be more practical. For a destination trailer that stays parked for long periods, a suitable TV stand can also be considered, provided the television is protected against tipping and safely stored or restrained before the trailer moves.
Once you have confirmed a suitable mounting location, the next step is selecting a bracket that fits your TV and works with your RV’s available space.
What TV Mount and Tools Do You Need?
The best RV TV mount is one that fits your television, works with the verified mounting surface, and accommodates how you use the space. A 24-inch TV in a compact camper bedroom may need little adjustment, while a television in the main living area might need to swivel toward the sofa or dinette.
There are three common mounting styles worth considering:
| TV Mount Type | Best For | Main Consideration |
|---|---|---|
| Fixed Mount | Small bedrooms and single viewing positions | Sits close to the wall but offers little adjustment |
| Tilt Mount | TVs mounted above eye level | Adjusts the vertical viewing angle to reduce glare |
| Locking Articulating Mount | Living areas with multiple seating positions | Swivels and extends outward, increasing leverage on the mounting points |
Before buying or installing a bracket, check your TV’s VESA mounting pattern, which is the spacing between the mounting holes on the back of the television. Common patterns for smaller TVs include 75 × 75 mm and 100 × 100 mm, although the correct size depends on the model. Also verify that the mount supports your TV’s weight and that your RV’s mounting structure can safely support the complete installation.
For an articulating mount, consider how far the TV extends from the wall. A longer arm places greater stress on the mounting points when extended, even if the TV itself is relatively lightweight. Make sure the TV can also fold back without hitting cabinets, doors, or nearby furniture. If you plan to travel with the television attached, check the mount manufacturer’s instructions for its approved travel position and any required locking mechanism.
Prepare these basic tools and materials before starting:
- Compatible TV mount and mounting hardware
- Stud finder or strong magnet, where suitable
- Drill and appropriate drill bits, if required
- Tape measure and bubble level
- Pencil or painter’s tape for marking
- Screwdriver or suitable driver
- Drill depth stop for installations requiring drilling
- Fasteners approved for the mounting surface
One important distinction: the screws that secure the wall bracket to your RV are not necessarily the same as the bolts that attach the mounting plate to the back of the TV. Both must be appropriate for their intended purpose.
With the mounting position verified and your materials ready, you can begin the installation.
How to Mount a TV in an RV: Step-by-Step Installation
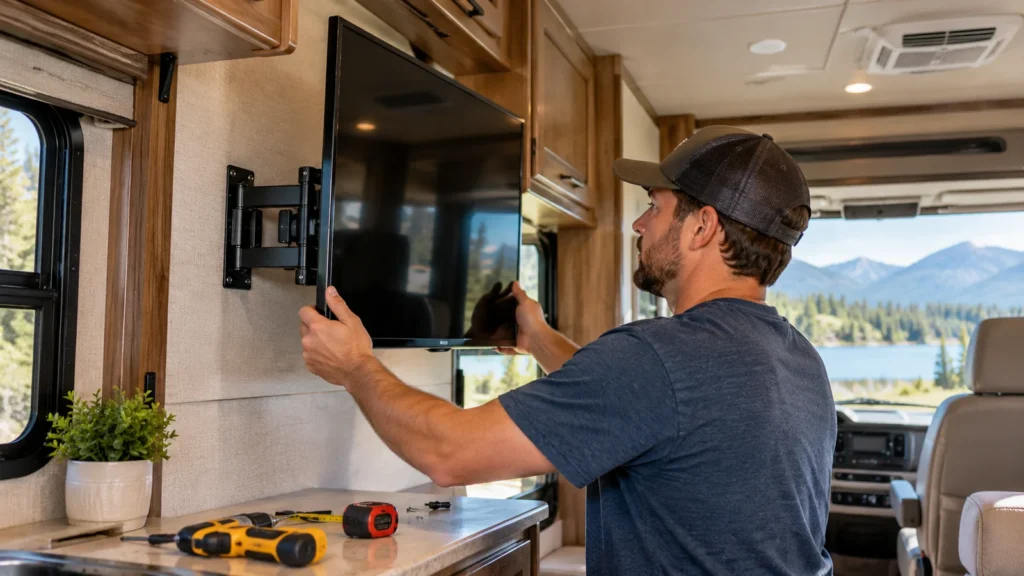
Once you’ve confirmed a suitable mounting location and selected a compatible bracket, installing a TV in an RV is similar to a standard wall-mount installation. The main differences are the mounting surface, the fasteners, and the limited space behind the wall.
Before starting, park your RV on level ground, turn off the TV, and disconnect any power or signal cables. Keep the instructions for both your television and mounting bracket nearby. If your RV manufacturer provides specific installation requirements, follow those rather than relying on general household TV mounting advice.
Step 1: Measure and Mark the Mounting Position
Start by deciding where the TV will be most comfortable to watch. In a camper bedroom, this might be directly across from the bed. In a travel trailer living area, you may want the screen positioned so it can be viewed from both the sofa and dinette.
Hold the wall bracket against the verified mounting area and check the height with a tape measure and level. Remember that the center of the wall bracket may not match the center of the TV screen, so check the mounting instructions before marking the final position.
If you’re using an articulating mount, consider the space the TV needs when extended and folded back. Make sure it won’t block a doorway, interfere with cabinet doors, or extend into a narrow walkway.
Once the position is confirmed, mark the bracket’s mounting holes with a pencil or painter’s tape. All required mounting points should align with the approved backing or support structure.
Step 2: Check the Screws and Drilling Requirements
Do not start drilling until you’ve confirmed the correct fasteners and allowable drilling depth. This is especially important when mounting a TV on an RV wall because there may be very little clearance between the interior panel and the exterior wall.
The appropriate screws depend on the backing material and the instructions provided by your RV manufacturer. A plywood backer, steel backing plate, and structural framing may require different fasteners and installation methods.
Some RV installations call for pilot holes, while others use specific fasteners without pre-drilling. Follow the instructions for your particular RV and mounting hardware rather than assuming every wall needs the same drilling method.
If pilot holes are required, use the specified drill bit and a depth stop to prevent drilling beyond the permitted depth. Check for possible electrical wiring, plumbing, or other hidden components before drilling. A drill depth stop helps control penetration, but it cannot make an unknown drilling location safe.
Avoid using long lag bolts simply because they came with a household TV mount. If you’re unsure what fasteners your RV wall requires, confirm the details with the manufacturer before proceeding.
Step 3: Attach the Wall Bracket
With the mounting holes prepared according to the applicable instructions, position the bracket against the wall and secure it using the specified hardware.
Start the fasteners carefully, keeping the bracket aligned with your marks. Check that it remains level before tightening everything to the manufacturer’s requirements. Avoid over-tightening, which can strip threads, damage backing material, or deform the mounting surface.
If your bracket uses a separate wall plate and articulating arm, follow the installation sequence provided with the mount. Some designs require assembling the arm after the wall plate is secured, while others arrive partially assembled.
Once attached, inspect the bracket and surrounding wall for visible movement, cracking, deformation, or loose fasteners. Do not continue if the bracket shifts or the mounting surface shows signs of damage.
A properly installed bracket should remain firmly attached during the checks specified by its manufacturer. However, pulling on the bracket or hanging extra weight from it is not a substitute for confirming that the underlying structure meets the required load rating.
Step 4: Attach the Mounting Plate to the TV
Place the television face down on a clean, soft, flat surface that supports the screen without putting pressure on it. Follow your TV manufacturer’s handling instructions, especially for thin displays.
Locate the VESA mounting holes on the back of the TV and align them with the mounting plate. Use the bolt size and length specified for your television and bracket. Some TVs have recessed mounting holes or require spacers, so don’t assume every bolt supplied with the mount will fit correctly.
Tighten the bolts evenly according to the instructions without forcing them. A bolt that is too short may not engage sufficiently, while one that is too long can damage the television.
Before lifting the TV, make sure the mounting plate is correctly oriented and securely attached.
Step 5: Hang and Secure the TV
Carefully lift the TV and connect its mounting plate to the wall bracket, following the mount manufacturer’s instructions. Having a second person help is especially useful in the limited space inside a camper.
Depending on the mount, the television may slide onto a receiver, hook over a wall plate, or attach directly to an articulating arm. Engage all required safety screws, latches, or retaining mechanisms before releasing your support of the TV.
Once the connection is secure, check that the television sits correctly and does not move unexpectedly within the bracket.
For an articulating mount, slowly move the screen through its intended range of motion. Make sure the arm operates smoothly and that the TV doesn’t contact nearby cabinets, walls, or furniture.
Step 6: Connect Cables and Test the Installation
After the TV is securely mounted, connect the power cord, HDMI cables, antenna cable, or other required connections.
Leave enough cable slack for the mount’s intended movement, particularly if you’re using a swivel or articulating arm. Cables should not become stretched, trapped between moving parts, or pinched when the television is pushed back against the wall.
Turn on the TV and confirm that the screen, connected devices, and controls work normally. Adjust the viewing angle from your usual seating position, then return the television to its stored position.
Before considering the installation complete, check the wall bracket, TV mounting plate, locking hardware, and surrounding mounting surface for any signs of movement or damage. If anything feels loose or unstable, stop using the installation until the cause is resolved.
At this point, the TV should be ready for use while your RV is parked. However, a secure installation while stationary does not automatically mean the television is ready for travel.
Securing Your RV TV for Travel
An RV television experiences conditions that a typical household TV does not. Road vibrations, bumps, turns, and sudden stops can place repeated stress on the wall bracket and its mounting points. This is particularly important with articulating mounts, where an unsecured arm can swing outward while the vehicle is moving.
There are two common approaches to securing a TV for travel. Some RV-specific mounts are designed to keep the television attached in a locked travel position. Others require the TV to be removed and stored separately before driving.
A locking feature alone does not guarantee that a mount is approved for travel with the television attached. Always follow the travel instructions for your specific mount. If your mount is approved for travel with the TV installed, return the arm to its designated position and engage the required lock or restraint.
If the manufacturer requires removal, disconnect the cables and store the television securely where it cannot slide, tip, or be struck by loose objects. Do not rely on an ordinary bungee cord to compensate for an unsuitable mount or weak wall support.
Before leaving your campsite, complete this quick RV TV travel safety checklist:
- The wall bracket and mounting hardware show no signs of looseness or damage.
- The TV is locked in its approved travel position or removed as instructed.
- No mounting arm or loose component can swing freely.
- Power and signal cables are disconnected or secured as required, with no risk of pinching or pulling.
- The TV and mount will not interfere with doors, cabinets, walkways, or other interior fixtures.
After your first trip with a newly mounted TV, inspect the installation again while parked. Check for loosening, shifting, or visible changes around the mounting points. Any signs of damage should be addressed before the television is used again.
Conclusion
Installing a TV in an RV or camper is manageable when you begin with a verified mounting surface, select compatible hardware, and follow the correct installation procedure. Most importantly, make sure the television is safely secured or stored before traveling. A little extra care during installation can help protect your TV, your RV, and everyone inside.
FAQs
Can I screw directly into an RV wall?
Yes, but only when the screws are secured into a suitable, verified mounting structure. Thin decorative wall paneling alone may not support a television. Check your RV manufacturer’s instructions and confirm the backing material, fasteners, and drilling depth before making holes.
Where is the TV backer located in an RV?
Many RVs have a TV Backer sticker near the intended mounting area, often in a bedroom or living room. Check your owner’s manual and use suitable locating tools to verify the actual reinforced area. Not every RV has a factory-installed TV backer.
Can you mount a TV in an RV without studs?
Sometimes. A manufacturer-approved backing plate or properly designed reinforcement may provide an alternative mounting surface. If no reliable structural support can be verified, do not attach the bracket directly to thin wall paneling.
Do you need a special TV mount for an RV?
Not necessarily, but the mount must be compatible with your TV and the RV’s mounting structure. An RV-specific model with a suitable travel-locking system can be convenient. Always check whether the manufacturer permits traveling with the TV attached.
Can you use a regular TV in an RV?
Yes. Many standard flat-screen TVs can be used in RVs when their mounting, power, and operating requirements are met. Check the TV’s weight, VESA pattern, available space, and power supply before installation, and follow any manufacturer restrictions on mobile use.